

SDL学习
今天简单学习一了一下SDL库的使用代码如下:
#include <SDL2/SDL.h>
#include <SDL2/SDL_ttf.h>
#include <SDL2/SDL_image.h>
#include <stdio.h>
#include <time.h>
#include <stdlib.h>
SDL_Window *window;
SDL_Renderer *renderer;
TTF_Font *font;
TTF_Font *font1;
TTF_Font *font2;
int init(void)
{
if (SDL_Init(SDL_INIT_VIDEO | SDL_INIT_TIMER) < 0)
{
printf("SDL could not initialize! SDL_Error: %s\n", SDL_GetError());
return -1;
}
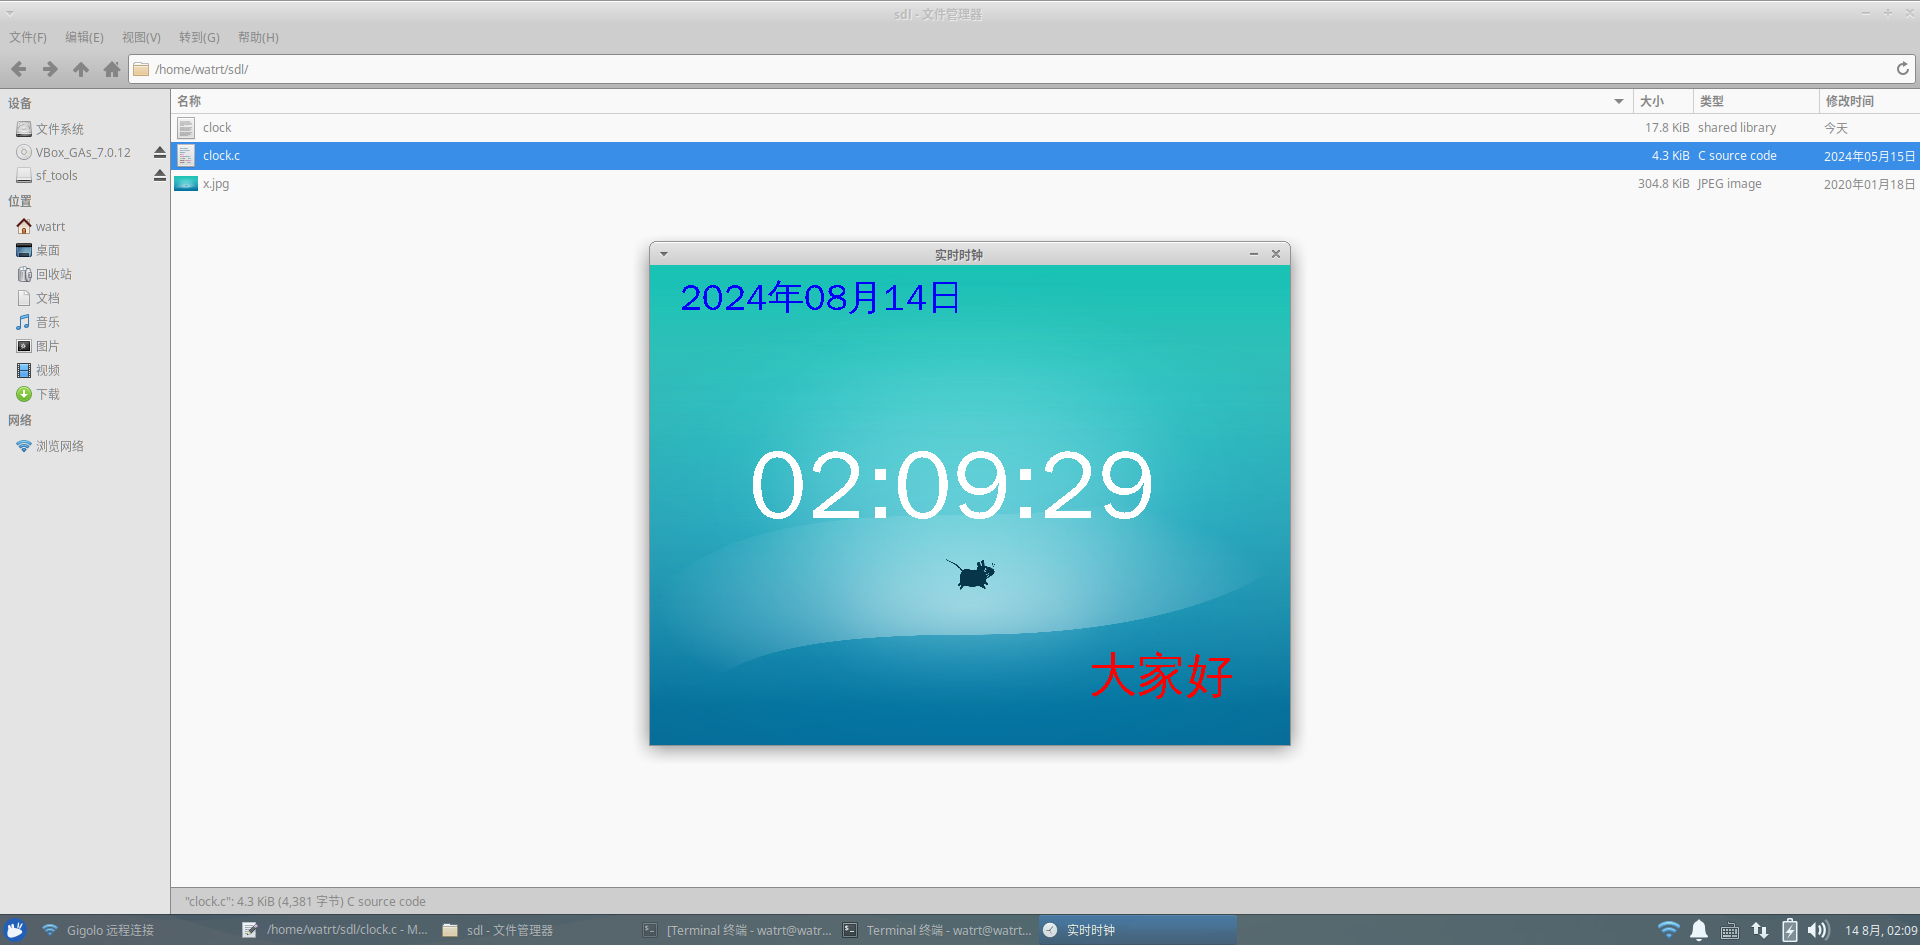
window = SDL_CreateWindow("实时时钟", SDL_WINDOWPOS_UNDEFINED, SDL_WINDOWPOS_UNDEFINED, 640, 480, SDL_WINDOW_SHOWN);
if (!window)
{
printf("Window could not be created! SDL_Error: %s\n", SDL_GetError());
return -1;
}
renderer = SDL_CreateRenderer(window, -1, SDL_RENDERER_ACCELERATED);
if (!renderer)
{
printf("Renderer could not be created! SDL_Error: %s\n", SDL_GetError());
return -1;
}
if (TTF_Init() == -1)
{
printf("TTF could not initialize! SDL_ttf Error: %s\n", TTF_GetError());
return -1;
}
font = TTF_OpenFont("/usr/share/fonts/truetype/wqy/wqy-zenhei.ttc", 36);
font1 = TTF_OpenFont("/usr/share/fonts/truetype/wqy/wqy-zenhei.ttc", 96);
font2 = TTF_OpenFont("/usr/share/fonts/truetype/wqy/wqy-zenhei.ttc", 48);
TTF_SetFontHinting(font, TTF_HINTING_LIGHT);
TTF_SetFontHinting(font1, TTF_HINTING_LIGHT);
TTF_SetFontHinting(font2, TTF_HINTING_LIGHT);
if (!font)
{
printf("Failed to load font! SDL_ttf Error: %s\n", TTF_GetError());
return -1;
}
return 0;
}
char *getFormattedDateTime(void)
{
time_t rawtime;
struct tm *timeinfo;
static char buffer[80];
time(&rawtime);
timeinfo = localtime(&rawtime);
strftime(buffer, sizeof(buffer), "%H:%M:%S", timeinfo);
return buffer;
}
char *getFormattedDate(void)
{
time_t rawtime;
struct tm *timeinfo;
static char buffer[80];
time(&rawtime);
timeinfo = localtime(&rawtime);
strftime(buffer, sizeof(buffer), "%Y年%m月%d日", timeinfo);
return buffer;
}
void renderText(const char *text, int x, int y, TTF_Font *f, SDL_Color textColor)
{
SDL_Surface *textSurface = TTF_RenderUTF8_Solid(f, text, textColor);
SDL_Texture *textTexture = SDL_CreateTextureFromSurface(renderer, textSurface);
SDL_Rect textRect = {x, y, textSurface->w, textSurface->h};
SDL_RenderCopy(renderer, textTexture, NULL, &textRect);
SDL_FreeSurface(textSurface);
SDL_DestroyTexture(textTexture);
}
int main(int argc, char *args[])
{
if (init() != 0)
{
return -1;
}
int quit = 0;
SDL_Event e;
int windowWidth, windowHeight;
SDL_Surface *backgroundSurface = NULL;
SDL_Texture *backgroundTexture = NULL;
SDL_GetWindowSize(window, &windowWidth, &windowHeight);
if ((backgroundSurface = IMG_Load("./x.jpg")) == NULL)
{ // 请替换为你的图片路径
printf("无法加载背景图片: %s\n", IMG_GetError());
SDL_SetRenderDrawColor(renderer, 0, 0, 0, 255);
}
else
{
backgroundTexture = SDL_CreateTextureFromSurface(renderer, backgroundSurface);
SDL_FreeSurface(backgroundSurface);
}
while (!quit)
{
while (SDL_PollEvent(&e) != 0)
{
if (e.type == SDL_QUIT)
{
quit = 1;
}
}
SDL_RenderClear(renderer);
if (backgroundTexture)
{
SDL_RenderCopy(renderer, backgroundTexture, NULL, NULL);
}
char *dateTimeStr = getFormattedDateTime();
SDL_Color dateTimeColor = {255, 255, 255, 255}; // 白色
renderText(dateTimeStr, 100, 160, font1, dateTimeColor); // 假设在左上角显示
dateTimeStr = getFormattedDate();
SDL_Color dateColor = {0, 0, 255, 255}; // 蓝色
renderText(dateTimeStr, 30, 10, font, dateColor);
SDL_Color greetingColor = {255, 0, 0, 255}; // 红色
renderText((char *)"大家好", windowWidth - 200, windowHeight - 100, font2, greetingColor); // 在右下角显示问候语
// 注意:阴历显示需额外实现,这里省略
SDL_RenderPresent(renderer);
SDL_Delay(1000); // 每秒更新一次
}
TTF_CloseFont(font);
TTF_Quit();
SDL_DestroyRenderer(renderer);
SDL_DestroyWindow(window);
SDL_Quit();
return 0;
}编译代码:
gcc -I/usr/include/x86_64-linux-gnu/ -o clock clock.c -lSDL2 -lSDL2_ttf -lSDL2_image &&./clock
打赏
 支付宝打赏
支付宝打赏
 微信打赏
微信打赏
支付宝打赏
微信打赏